How to start using Rotating Residential Proxies ?
Setting your Rotating Residential Proxies is an easy process, very similar to any other proxy type.
The first step is to sign-up and choose your Rotating Residential Proxy membership plan (Basic or Special and proceed with the payment process.
Special Rotating Residential Proxies:
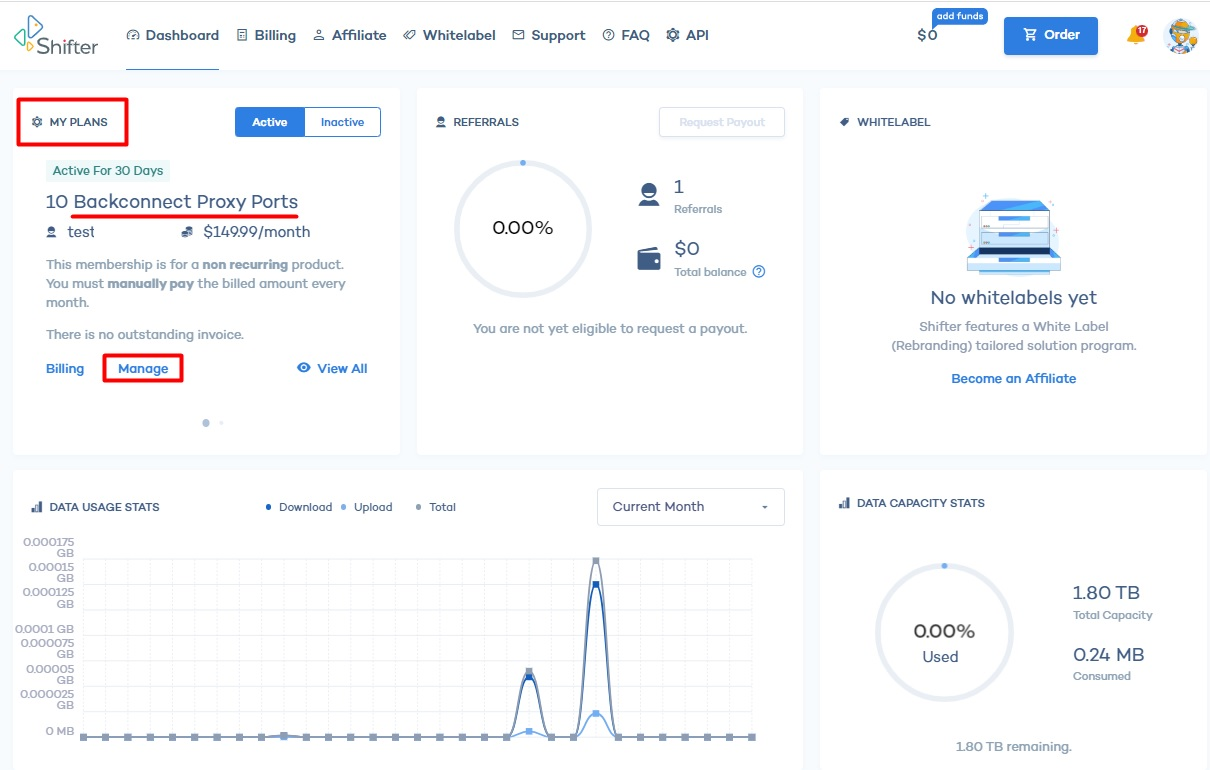
Access your account dashboard
Once you completed the sign-up process access your account and check your user dashboard:
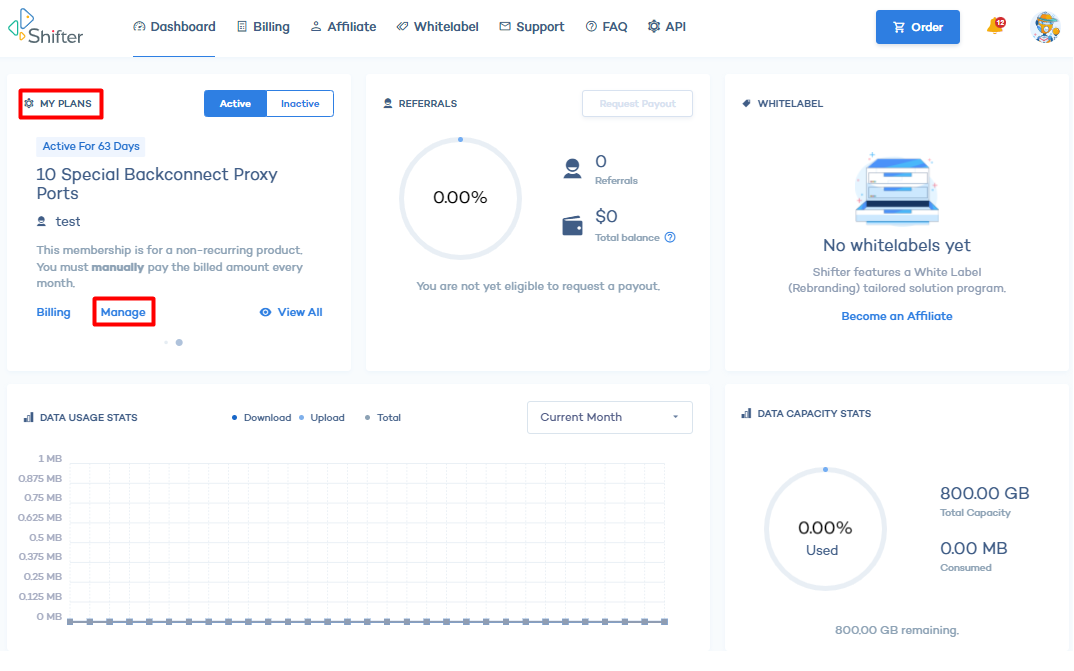
You will notice the following key elements:
- The list of plans on your account (including active and inactive for the full account history)
- The Data Usage section containing the daily bandwidth usage from all your rotating proxy memberships combined
- The Data Capacity Stats containing the total allocated bandwidth for all your memberships, extra traffic added (if any) and the total usage.
Configuring your rotating proxy memberships
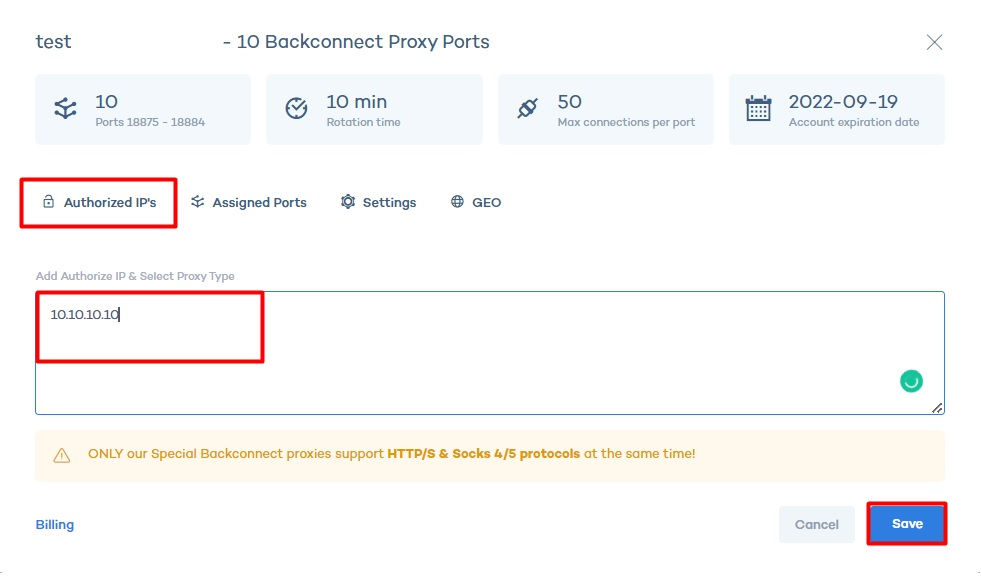
Step 1: Authentification
In order to access the configuration menu click on “Manage” for your selected membership plan and you see the configuration menu.
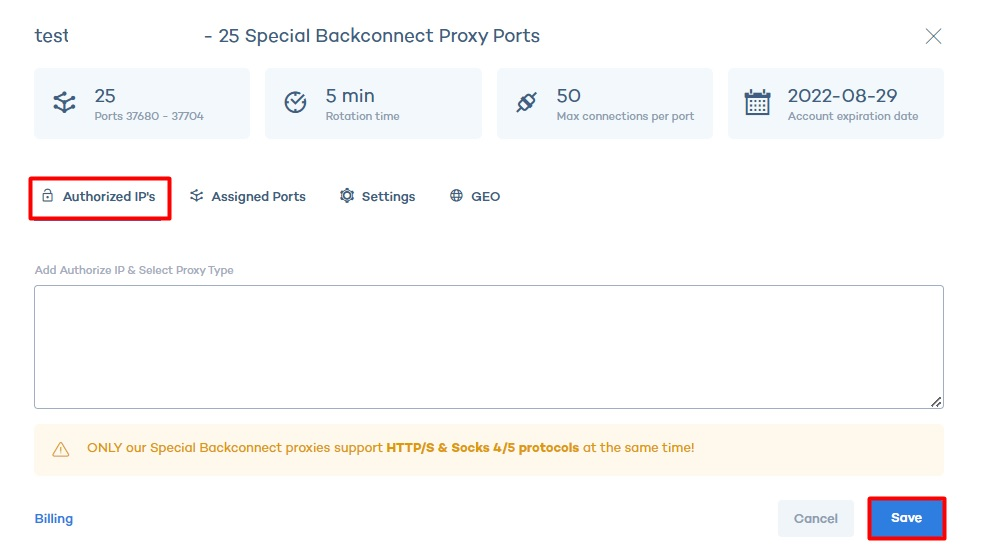
In the configuration menu you need to add your list of Authorised IPs before accessing your list of proxy ports. Just copy paste the list of authorised IPs or add manually and click “Save” after every change (the list of authorised IPs represents every device IP that you plan to use when accessing your proxies - it can be your web servers, desktop computers or mobile devices)
Keep in mind that it takes 5 minutes before the changes you entered in the configuration menu to be activated in the system (adding an authorised IP address and then immediately trying to access the proxy ports from that authorised IP address will not work as the 5 minutes have not passed).
Step 2: Settings
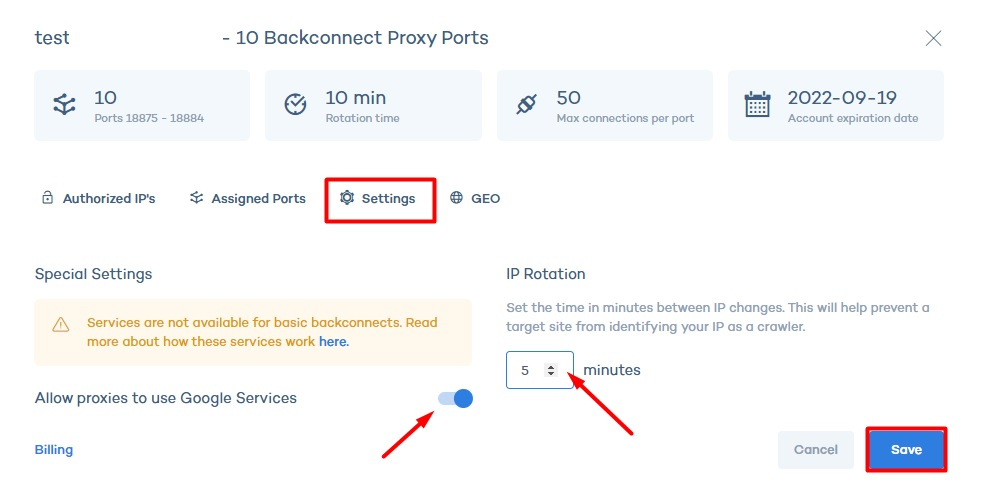
Click the Settings section in order to access the following options:
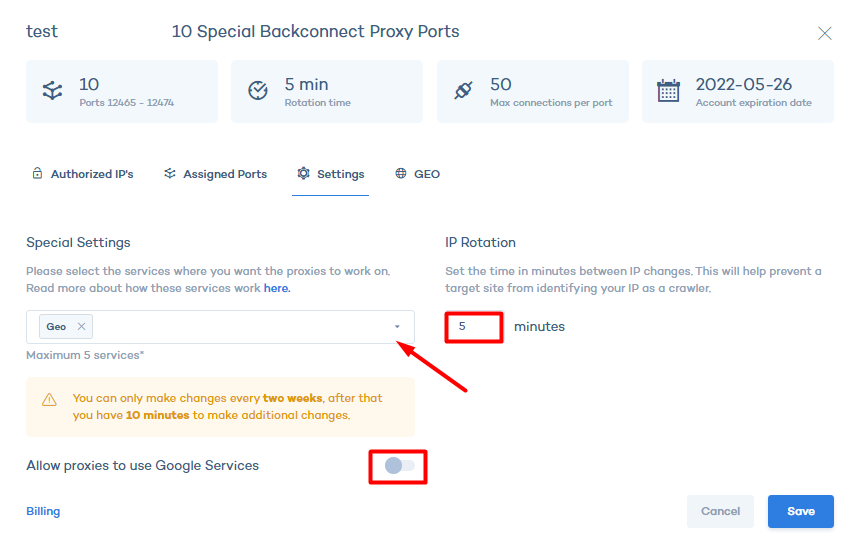
In the Special Settings section you can choose the services you want to activate for your membership (maxim 5 for each service memberships).
If you want to activate Geolocation targeting choose Geo from the list (otherwise your proxy ports will be assigned random IP addresses from random locations).
Continue and select from the list any service that is relevant for your use case (for example if you do Amazon web scraping, select Amazon from the list).
In the IP Rotation section select the automatic IP rotation time in minutes (your proxy ports will be assigned automatically a new IP address every rotation time, for example if you set 5 minutes, every 5 minutes a new residential IP address will be assigned).
If you are looking to use or access Google related services (including pages that have Google Recaptcha checks) activated the Allow proxies to use Google Services button
Step 3: Configure Geotargeting
Click the GEO section in order to open the geotargeting configuration section:
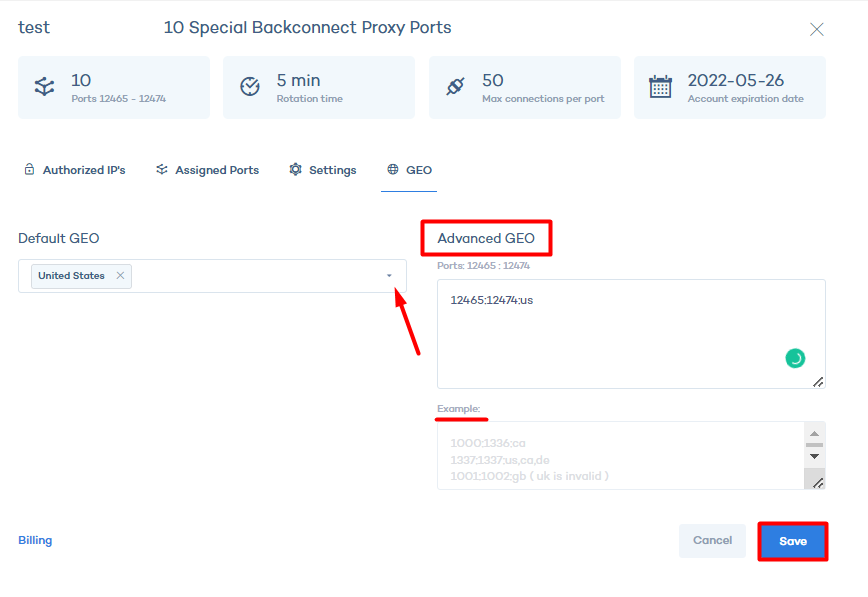
If you want to select and assign a default geo for all your proxy ports, just select the countries you want to in the Default GEO section.
If you are looking to assign specific GEOs to your proxy ports use the configuration in the Advanced GEO section as in the example (in our screenshot the port range from 12465 to 12474 was assigned the United States geo location). Step 4: Get your proxy ports list and start using rotating residential proxies
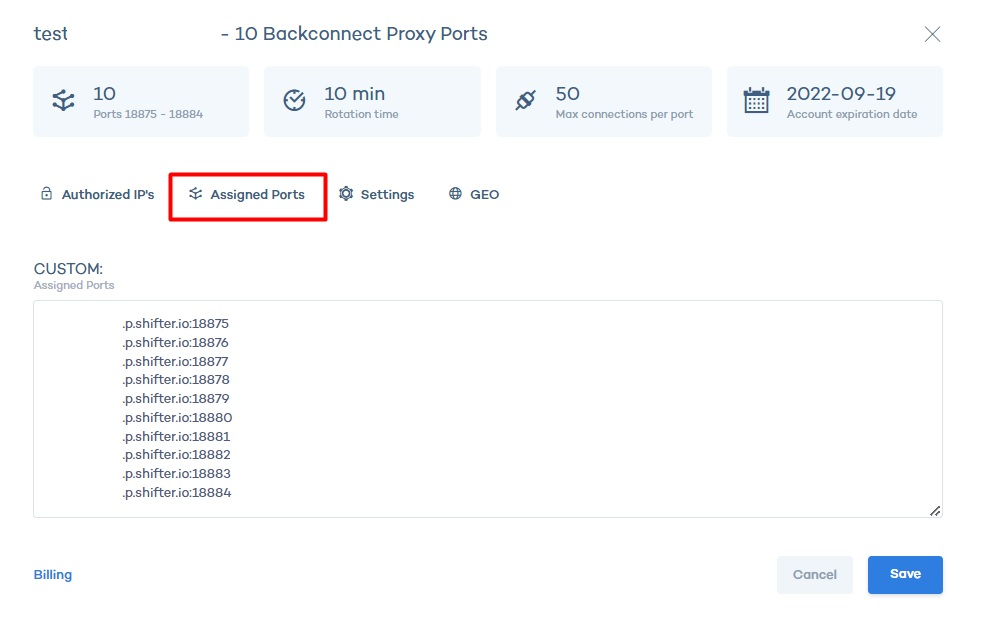
Click on the Assigned Ports section and see your full list of ports.
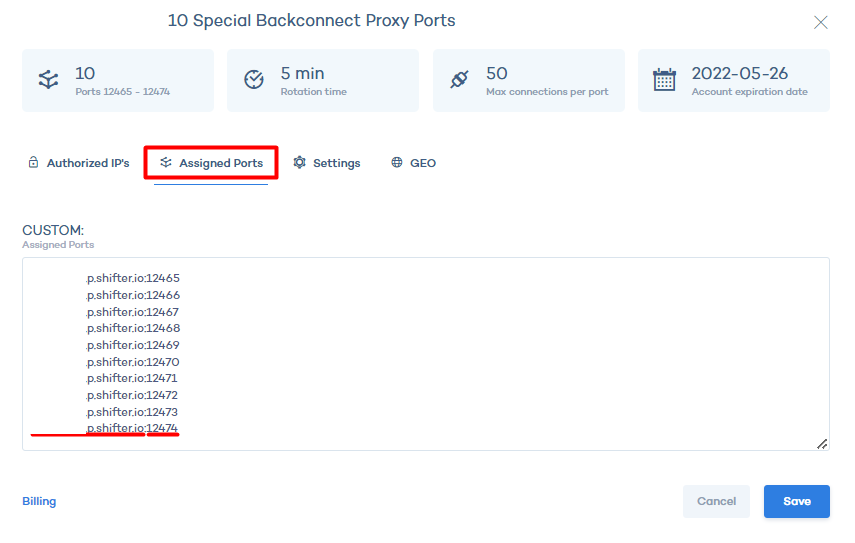
Integrate the proxy ports list in your browser, application or 3rd party tool.
Basic Rotating Residential Proxies:
Access your account dashboard
Once you completed the sign-up process access your account and check your user dashboard:
You will notice the following key elements:
- The list of plans on your account (including active and inactive for the full account history)
- The Data Usage section containing the daily bandwidth usage from all your rotating proxy memberships combined
- The Data Capacity Stats containing the total allocated bandwidth for all your memberships, extra traffic added (if any) and the total usage.
Configuring your rotating proxy memberships
Step 1: Authentification
In order to access the configuration menu click on “Manage” for your selected membership plan and you see the configuration menu.
Step 2: Settings
Click the Settings section in order to access the following options:
In the IP Rotation section select the automatic IP rotation time in minutes (your proxy ports will be assigned automatically a new IP address every rotation time, for example if you set 5 minutes, every 5 minutes a new residential IP address will be assigned).
If you are looking to use or access Google related services (including pages that have Google Recaptcha checks) activated the Allow proxies to use Google Services button
Keep in mind that geolocation targeting is not available on basic rotating proxies plans.
Step 3: Get your proxy ports list and start using rotating residential proxies
Click on the Assigned Ports section and see your full list of ports.
Integrate the proxy ports list in your browser, application or 3rd party tool.